Get ready to cozy up with a plate of my Pumpkin Spice Pancakes! This fall treat combines warm, sweet flavors that make mornings feel special. Using simple ingredients, you’ll whip up light and fluffy pancakes that everyone will love. Whether you’re cooking for family or friends, these pancakes add the perfect autumn charm to your breakfast table. Join me as I show you how to create this irresistible dish step by step!
Ingredients
To make pumpkin spice pancakes, you need these key ingredients:
– 1 cup all-purpose flour
– 1 tablespoon baking powder
– 1 teaspoon pumpkin pie spice
– 1/2 teaspoon salt
– 1 cup milk (any type)
– 1/2 cup canned pumpkin puree
– 1 large egg
– 2 tablespoons pure maple syrup
– 1 teaspoon vanilla extract
– 2 tablespoons unsalted butter, melted (plus more for frying)
Each ingredient plays a vital role. The all-purpose flour forms the pancake base. Baking powder adds fluffiness. Pumpkin pie spice gives that warm, fall flavor. Salt enhances all the tastes.
You can use any milk you prefer, like whole, almond, or oat milk. Canned pumpkin puree brings moisture and a rich taste. The egg binds the mix together and adds protein. Pure maple syrup not only sweetens but also adds a depth of flavor. Vanilla extract elevates the taste further, while unsalted butter ensures a rich texture.
Step-by-Step Instructions
Preparation of dry ingredients
First, gather your dry ingredients. In a large bowl, mix the all-purpose flour, baking powder, pumpkin pie spice, and salt. Use a whisk to blend these dry components well. This helps to avoid any clumps. Mixing evenly is key for even cooking.
Preparation of wet ingredients
Next, it’s time for the wet ingredients. In a separate bowl, combine the milk, canned pumpkin puree, egg, maple syrup, vanilla extract, and melted butter. Whisk these together until you achieve a smooth consistency. This step ensures a creamy batter full of flavor.
Blending the mixtures
Carefully pour the wet mixture into the dry ingredients. Use a spatula or wooden spoon to mix them. It’s important to avoid overmixing. A few lumps in the batter are okay. This keeps your pancakes fluffy and light.
Cooking the pancakes
Now, let’s cook the pancakes! Preheat a non-stick skillet or griddle over medium heat. Once hot, add a small amount of butter to coat the surface. This helps the pancakes cook evenly. Pour about 1/4 cup of batter for each pancake. Leave space between them, as they will spread.
Cook the pancakes for 2-3 minutes. Look for bubbles on the surface and firm edges. Flip each pancake gently and cook for another 2-3 minutes until they turn golden brown. As you finish cooking, transfer the pancakes to a warm oven set at 200°F (93°C). This keeps them warm and fluffy until you are ready to serve.
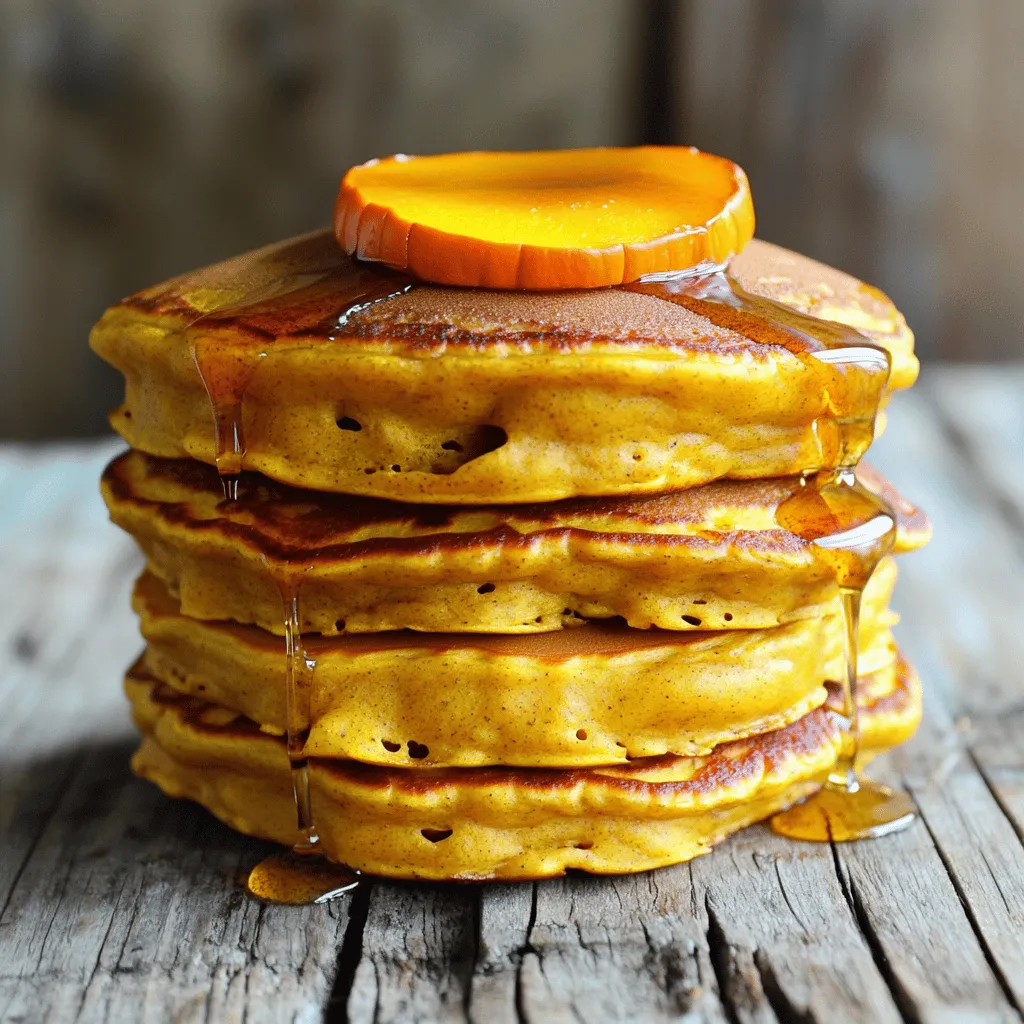
For serving, stack them high on a warm plate. Drizzle with maple syrup and sprinkle with extra pumpkin pie spice for that perfect fall flavor.
Tips & Tricks
Achieving perfect pancake texture
To make pumpkin spice pancakes fluffy, use fresh baking powder. Fresh ingredients make a big difference. Measure your flour correctly by spooning it into the cup, then leveling it off. This helps avoid dense pancakes.
Resting the batter is key. Let it sit for about 10 minutes. This allows the flour to absorb the wet ingredients. Your pancakes will be lighter and fluffier.
Keeping pancakes warm
To keep your pancakes warm while you cook, use an oven. Preheat your oven to 200°F (93°C). As each pancake cooks, place it on a tray in the oven. This will keep them warm without drying them out.
Presentation suggestions
For a stunning presentation, stack the pancakes high on a warm plate. Add a drizzle of maple syrup on top. Sprinkle extra pumpkin pie spice for a pop of color.
You can also garnish with fresh banana slices or a dollop of whipped cream. These additions make your dish more inviting and fun to eat.

Variations
Flavor enhancements
You can make your pumpkin spice pancakes even better with a few tasty tweaks.
– Adding chocolate chips: Mix in a handful of chocolate chips for a sweet twist. The rich chocolate pairs well with the pumpkin spice. You can use dark, milk, or even white chocolate.
– Incorporating nuts: Chopped nuts add crunch and flavor. Walnuts or pecans work great. They also boost the nutrition in your pancakes.
Dietary modifications
Need to cater to special diets? I have you covered!
– Gluten-free options: Replace all-purpose flour with a gluten-free flour blend. You can also use almond flour or oat flour. Just ensure the flour you choose works well for pancakes.
– Vegan substitutions: For a vegan version, swap milk for a plant-based milk. Use flaxseed meal or applesauce instead of the egg. It keeps the pancakes moist and delicious.
Serving ideas
What you put on top can change the whole meal! Try these ideas for great toppings:
– Pairings with toppings: Serve your pancakes with maple syrup, whipped cream, or a sprinkle of cinnamon. Fresh fruit like berries or banana slices also adds color and flavor. You can even drizzle some honey or nut butter for extra richness.
Storage Info
Refrigeration guidelines
Store leftover pancakes in an airtight container. Make sure they cool first. Place a piece of parchment paper between layers to keep them from sticking. They will stay fresh for about three days in the fridge.
Freezing instructions
To freeze pancakes, stack them with parchment paper between each one. Place the stack in a freezer-safe bag or container. Remove as much air as possible. You can store them this way for up to two months.
For thawing, take out the number you need. Let them sit in the fridge overnight, or use the microwave for a quick thaw. To reheat, warm them in a skillet over low heat or microwave for about 30 seconds.
Freshness tips
The maximum storage duration in the fridge is three days. For the best taste, eat pancakes fresh. If freezing, consume them within two months for optimal flavor. Always check for any signs of freezer burn before using.
FAQs
Can I make pumpkin spice pancakes without eggs?
Yes, you can! If you want to skip the eggs, use these alternatives:
– 1/4 cup unsweetened applesauce
– 1/4 cup mashed banana
– 1/4 cup yogurt (dairy or non-dairy)
These options add moisture and help bind the mix. Each works well in pumpkin spice pancakes.
How do I know when pancakes are done cooking?
Look for these signs:
– Bubbles form on the surface.
– Edges appear set and firm.
– A golden color on both sides.
When you see these signs, your pancakes are ready to flip!
Can I prepare the batter in advance?
Yes, you can make the batter ahead of time. Here’s how:
– Mix the dry and wet ingredients separately.
– Store them in the fridge for up to 24 hours.
– Combine them just before cooking.
This saves time on busy mornings and keeps your pancakes fresh!
What toppings go well with pumpkin spice pancakes?
Here are some tasty topping ideas:
– Maple syrup for that sweet touch.
– Whipped cream for a fluffy bite.
– Chopped nuts for crunch.
– Sliced bananas or apples for added fruit.
These toppings enhance the flavor and make your pancakes even more enjoyable.
In this blog post, we explored how to make delicious pumpkin spice pancakes. We covered the ingredients needed, from flour to maple syrup, and gave you step-by-step instructions for preparation and cooking. You learned tips for fluffy pancakes and creative variations for different diets. We also discussed storage and answered common questions about making pancakes.
Remember, you can enjoy these pancakes any time, not just in fall. Experiment with flavors and toppings to make them your own!


